 I finally got the chance to experience the culinary delight that is Datsun, which opened its doors last October. I had heard great things about this pan-Asian restaurant, including being recognized as one of the best new restaurants to try in Ottawa in 2015, and so I went into it with very high expectations. And for the first time in awhile, I was not disappointed. I loved everything about Datsun, from its trendy and contemporary decor to its sharable Asian small plates, unique cocktails and friendly service. Basically, everything was on point.
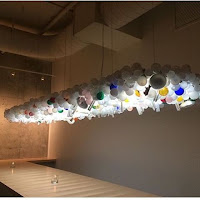
Matt Carmichael, Ottawa’s hottest chef and mastermind behind the taco eatery El Camino, has indeed done it again! Located right beside his taqueria on Elgin Street, Carmichael has once more proven his ability to be explosively successful. Even though both restaurants are located in similar spaces with almost identical take-out windows, Datsun couldn’t be more different. El Camino is rustic and dark with a raucous vibe, while Datsun is light, modern and screams what I like to call ‘simplistic cool’.
 We went on a Wednesday night and it was packed. Despite the cold weather, every single seat was filled. Clearly, we came to the right place. We were seated near the front of the restaurant at a cafeteria style table fitted with swivel seats, sandwiched between fellow Ottawa foodies. I would have much preferred a regular chair or high stool, but I suppose the cafeteria seating added to the experience.
 Throughout the evening, our server was friendly and efficient, though not overly attentive. We were given the ‘new diner’ spiel and advised that the menu focuses on small plates intended to be shared amongst the table, tapas style. I quite enjoyed the fill-in-your-order paper menu, which I’ve grown accustomed to at most dim sum joints.
 We went on a Wednesday night and it was packed. Despite the cold weather, every single seat was filled. Clearly, we came to the right place. We were seated near the front of the restaurant at a cafeteria style table fitted with swivel seats, sandwiched between fellow Ottawa foodies. I would have much preferred a regular chair or high stool, but I suppose the cafeteria seating added to the experience.
  Throughout the evening, our server was friendly and efficient, though not overly attentive. We were given the ‘new diner’ spiel and advised that the menu focuses on small plates intended to be shared amongst the table, tapas style. I quite enjoyed the fill-in-your-order paper menu, which I’ve grown accustomed to at most dim sum joints.
Now, I have to give you a heads-up that we were rather modest when it came to ordering. We decided to be reasonable and we only ordered 3 dishes to share. Looking back now, a party of two could easily share 4 to 6 dishes (depending on the plate). But we’ve learnt our lesson, and this just means that we will have to return again soon.

 Next up was the Tuna Tartare, which was topped with cream cheese and furiyake, and served with nori (seaweed sheets) and a side of wasabi. The best way to eat this dish was to place the tuna on a seaweed sheet, fold it over and enjoy it like a wrap! Again, this dish was mouth-wateringly delicious and really hit the spot.

So for our three dishes, we went with the Crispy Chicken Steamed Buns (2 for $9), the Tuna Tartare ($15) and the Shrimp and Water Chestnut Dumplings ($10). Virtually everyone had told us beforehand that the steamed buns were a must-try (and they were not wrong).
The night started off with a bang when two perfectly cooked steamed buns wrapped around crispy fried chicken drizzled with ranch dressing and furiyake were presented to us. The combination of flavours and textures was out of this world. Hands down, this was my favourite dish of the evening.
The night started off with a bang when two perfectly cooked steamed buns wrapped around crispy fried chicken drizzled with ranch dressing and furiyake were presented to us. The combination of flavours and textures was out of this world. Hands down, this was my favourite dish of the evening.
 Next up was the Tuna Tartare, which was topped with cream cheese and furiyake, and served with nori (seaweed sheets) and a side of wasabi. The best way to eat this dish was to place the tuna on a seaweed sheet, fold it over and enjoy it like a wrap! Again, this dish was mouth-wateringly delicious and really hit the spot.
Finally, eight flawless dumplings filled with chunks of shrimp, water chestnuts and soaked in soya sauce capped off our culinary experience. The dumplings were flavourful and cooked to perfection.
I have absolutely no complaints when it comes to any of the food. Everything was phenomenal, especially the steamed buns. If the other dishes on the menu are as good as these three dishes, then I can’t wait to return and try the rest! I definitely have my eye on one of the ramen bowls and the succulent pork belly steamed bun.
I’ve also heard that their cocktails are as much of a draw as the food. Unfortunately, we stuck to beer and wine (which was still great), so we didn’t try any of their unique cocktails. One of these days I may have to try the Datsun Flip ($22), an elaborate two-person cocktail served in a real coconut.
 So in the end, Datsun is a tremendously fun restaurant with plenty of character, creative food, apparently great cocktails, and competitive prices (that's a plus)! One part well-made cocktails, one part comfort food, one part soy sauce and spice: it’s a recipe for success.
If you haven’t yet experienced Datsun, you better get going…your taste buds will thank you! But be prepared for a wait, as this new hot spot does not take reservations. So perhaps I will see you in line, as you can guarantee that I will be returning to sample everything on their menu, including more steamed buns of course!
I’ve also heard that their cocktails are as much of a draw as the food. Unfortunately, we stuck to beer and wine (which was still great), so we didn’t try any of their unique cocktails. One of these days I may have to try the Datsun Flip ($22), an elaborate two-person cocktail served in a real coconut.
 So in the end, Datsun is a tremendously fun restaurant with plenty of character, creative food, apparently great cocktails, and competitive prices (that's a plus)! One part well-made cocktails, one part comfort food, one part soy sauce and spice: it’s a recipe for success.
 If you haven’t yet experienced Datsun, you better get going…your taste buds will thank you! But be prepared for a wait, as this new hot spot does not take reservations. So perhaps I will see you in line, as you can guarantee that I will be returning to sample everything on their menu, including more steamed buns of course!

Verdict: 10/10 – I loved the food and vibe! Datsun may just be one of my new favourite restaurants.
Hours: Monday to Saturday - 5:30 pm to late; Take-out window also open from noon to 2:30 pm from Monday to Saturday (closed on Sundays)
Price: small plates $9-$20
Datsun, 380 Elgin Street, Unit B, Ottawa, ON
eastdatsun.com

Hours: Monday to Saturday - 5:30 pm to late; Take-out window also open from noon to 2:30 pm from Monday to Saturday (closed on Sundays)
Price: small plates $9-$20
Datsun, 380 Elgin Street, Unit B, Ottawa, ON
eastdatsun.com


