Wednesday, October 17, 2012

Divine Chocolate Mousse (Recipe)

Chocolate mousse is probably my favourite dessert. It's light, fluffy yet totally decadent. I request this dessert at every family holiday as my aunt has definitely mastered this delicacy. This past Thanksgiving dinner she was gracious enough to share the recipe with me and I was lucky enough to make a successful batch even with my average baking skills. 


Ingredients:

- 1 cup of chocolate chips
- 4 large egg yolks (room temperature)
- 1/2 teaspoon of vanilla
- 4 egg whites (room temperature)
- 1/4 cup of icing sugar
- 1 cup of whipping cream

Directions:

1. Melt chocolate chips in a double boiler on medium heat. Make sure the chips don't melt too quickly or they will burn or become clumpy. Remove from heat and add egg yolks and vanilla into the pot and beat well. Transfer to a large bowl.

2. Beat egg whites in a separate bowl until stiff peaks form. This will take about 5 minutes. Gradually add icing sugar while beating.

3. In a separate bowl, beat 1 cup of whipping cream until stiff.

4. Gently fold the egg white mix into the chocolate mix. Gently fold in the whipping cream.

5. The secret is not to over mix when you are folding the egg white and whipped cream mixtures into the chocolate.

6. Let chill overnight and you have a delicious dessert to serve on its own or with fruit or cake.

Yields: Approximately 6 small servings.

Verdict: Simple recipe, little preparation time. Rich chocolate taste. Highly recommended.

Prep time: Make sure the egg whites and yolks are at room temperature. Separate them in two bowls and let stand for about 1-2 hours. Preparation time is approximately 20 minutes.

Rating: 9/10

Thursday, October 11, 2012

Apples, Apples, Apples (Recipes)

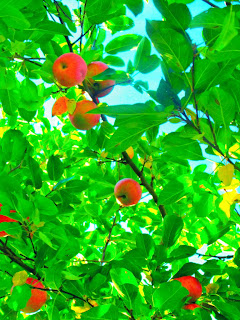
Apple picking season is slowly coming to a close, but I made sure to take advantage of it before it was over! This past Monday, I headed to the local apple orchard in Orleans. The sun was shining, the sky was blue and the apples were calling my name! 

With my apple picking stick in hand, I ventured  throughout the orchard picking apples high and low. Once I had chosen my prize-winning apples, I made my way to the front of the orchard and was greeted with a glass of homemade apple cider. The cider was amazing and it definitely hit the spot! After paying for my bounty, I headed home to begin my apple adventures!


Once I arrived home, I opened my bag of apples and thought about what to make. Since I love all things apple, it was hard to decide on one thing, so I choose five! I decided to make a traditional apple pie, apple crisp, mulled apple cider, soft apple hermit cookies and apple sauce! Also, that night for dinner, I made a special maple-rosemary apple sauce to go with the leftover Thanksgiving turkey.

To begin, I started with the apple pie. I decided to make a traditional, no-frills, pie to allow all of the flavour of the apples to really shine through! I also made the pie crust from scratch, instead of buying a pre-made crust, because let's be honest, it is so much better! But luckily, I have a very handy-dandy apple peeler/corer/slicer, and so the extra time I spent on the crust, I was able to save while prepping the apples. 

Rolling out the pie crust

Assembling the pie


In the end, the pie turned out great....the apples were rich and moist, and the crust was soft and flaky. I used a recipe from the Canadian Living website, entitled 'Grandma Thompson's Prize-Winning Apple Pie.' When I saw 'prize-winning', I knew it had to be good! You can find the recipe at the following link: http://www.canadianliving.com/food/grandma_thompsons_prize_winning_apple_pie.php. 

Next up was the apple crisp. You can never go wrong with apple crisp. Also, it is extremely easy to make and takes very little time. Since my apples were already prepped, all I needed to do was mix the apples with some cinnamon and sugar, and then combine the ingredients for the topping. I also threw in oats and walnuts in the topping, which I think gives it that extra kick! For the exact recipe, you can find it here: http://www.cookingnook.com/apple-crisp-recipe.html


While the apple crisp was baking in the oven, I went to work on the mulled apple cider. Again this is very easy recipe to make and requires very little effort. You basically just heat up apple cider in a saucepan and mix in a variety of spices and simmer over low heat for 20 minutes. The process may be simple, but the end result is divine. There is nothing better than a cup of hot apple cider! To recreate this heavenly drink, click here: http://www.simplyrecipes.com/recipes/hot_mulled_cider/.

After this, I went to work on the Soft Apple Hermit Cookies. These are fairly healthy as far as cookies go, since they call for Splenda instead of sugar. They are also filled with lots of other good stuff, such as raisins, walnuts, cinnamon, molasses, and apples of course! After they are baked, the cookies smell amazing and they taste just as good! The soft texture and spicy flavours are a real treat for the mouth! This recipe can be found on the Splenda website: https://www.splenda.ca/recipes/soft-apple-hermits-cookies.


Finally, the last recipe that I made was good old-fashioned apple sauce. In a saucepan, I combined 4 apples (peeled, cored, chopped), 1/4 cup of sugar, 3/4 cup of water and 1/2 teaspoon of cinnamon. I covered the pan, and cooked over medium heat for 20 minutes. After I allowed the apples to cool, I mashed them with a fork, stirred the mixture, and voila, I had apple sauce! If you've never made your own apple sauce before, I definitely recommend that you try it. It's simple, fast and easy, and homemade apple sauce is ten times better than store-bought brands!

Now my apple-inspired day was almost over, but I decided to whip up one last apple creation for dinner. Since Thanksgiving dinner was the night before, I had lots of leftover turkey. So instead of eating it with the traditional gravy, I chose to make a maple-rosemary apple glaze. After chopping 2 peeled and cored apples, I heated them up in a saucepan over medium heat. Once the apples were soft, I added in 2 tbsp of maple syrup, 1 tbsp of fresh chopped rosemary and 1/4 tsp of allspice. I cooked this on low heat for 10 minutes, and then served it over my turkey. It was great addition to the meal and paired quite nicely with the turkey. 


I also used the same maple-rosemary garnish for my sweet potatoes, which turned out superbly!


And that brings us to the end of my apple day! As you can tell, I love apples and everything that you can make with them. I hope that I have inspired you to create a new apple-infused dessert or meal!

Wednesday, October 10, 2012

Memories Restaurant and Bakery (Review)

We're always looking for casual outdoor dining spots in Ottawa during the summer and early fall months. We have such a beautiful Byward Market and we try to take advantage of its beauty and charm as much as possible. Memories Restaurant and Bakery, located on the corner of Clarence and Sussex in the Market, is a really great place to get hearty and home cooked-style meals at a reasonable price. They also serve delicious home-made desserts and a variety of specialty coffee and tea beverages.

I have lunched at Memories a few times now and have experienced fabulous and unique meals with their daily soups and quiches, as well as sandwiches and salads. The only possible negative comment I could make, and others may also agree, is that the service is sometimes slow, but don't mistake that with being unfriendly. I wouldn't recommend Memories for a rushed meal as you may become frustrated with their relaxed demeanor, but I have never been disappointed with their friendly and helpful attitudes. 

The last time we decided to stop in for lunch happened to be on an unexpected warm day in late September and we were lucky enough to sit on the patio; probably for the last time of the season. The broccoli and cheese quiche of the day was very appealing to me and it came with a delicious side salad with raspberry balsamic dressing. The vegetarian chili was equally delicious and came accompanied with fresh warm bread and a side salad. 

Vegetarian Chili
Quiche of the Day - Broccoli and Cheese
Their meals are rather simple with a homemade touch, but with their unique flare and daily specials, I find myself recommending Memories to a lot of locals and tourists alike. It's great for weekend brunches and lunches and long workday lunch breaks.

Memories is most appealing when the outdoor patio is in full swing, but the indoor cafe also has a cute charm and fares well during the winter months with a hot beverage and hearty soup.

Verdict: Great outdoor patio, simple yet unique meals, sometimes slow but friendly service. 8/10. Recommended.

Cost: Entrées vary between $10-$15.

Memories Restaurant, 7 Clarence Street in the Byward Market, Ottawa. 613-241-1882.

Sunday, October 7, 2012

Cinnamon Spiced Mini Cupcakes with Cream Cheese Frosting and Candied Ginger (Recipe)

Another party, another dessert! For Lola's birthday celebration, I made Cinnamon Spiced Mini Cupcakes with Cream Cheese Icing and Candied Ginger. I wanted to choose a recipe with bold flavours and unexpected pairings. I choose to make mini cupcakes, as let's be honest...everything is always better when it's mini...plus, you can eat more and not feel as guilty. Mini cupcakes are also a great idea for parties, as most guests do not want to eat a massive cupcake and much prefer a small, enjoyable treat.

In the end, the cupcakes turned out well! The combinaton of rich spices was definitely a palette pleaser, however, they were not quite as moist as I would have wanted. Also, as you can see from the picture below, I had some trouble with the frosting. For some reason, my frosting would not thicken, and as a result, it was quite runny and somewhat difficult to ice the cupcakes. Regardless of the icing troubles, they were still very yummy and the candied ginger was a perfect addition to the spiced cake.


Ingredients:

Spice Cake
  • 2 cups cake flour
  • 1 tbsp ground cinnamon
  • 2 tsp baking powder
  • 1/2 tsp ground allspice
  • 1/4 tsp ground nutmeg
  • 1/4 tsp salt
  • 1/4 cup unsalted butter, softened
  • 2/3 cup light brown sugar
  • 2 eggs
  • 3 tbsp molasses
  • 3/4 cup buttermilk
Cream Cheese Frosting
  • 6 ounces cream cheese, softened
  • 1/4 cup unsalted butter, softened
  • 2 cups powdered sugar, sifted
  • 1 1/2 teaspoons vanilla extract
Garnish
  • 1 cup candied ginger, chopped

Directions:
  1. Preheat oven to 350° F. 
  2. In a mixing bowl, sift together the flour, cinnamon, baking powder, allspice, nutmeg, and salt. Set aside.
  3. Using a hand mixer, cream together the butter and sugar, about 4 minutes. Scrape down the sides of the bowl.
  4. With the mixer running, add one egg at a time, followed by the molasses and buttermilk and mix until just combined.
  5. Whisk the dry mixture into the wet mixture and stir until no lumps remain.
  6. Line a mini muffin tin with mini cupcake liners and fill each liner 2/3 way up with batter.
  7. Bake the cupcakes for 20 to 25 minutes or until a toothpick comes out clean when removed from the centre.
  8. Allow to cool completely before frosting.
  9. For the frosting: Using a hand mixer, cream together the cream cheese and butter. Add the powdered sugar, 1/2 cup at a time until fully incorporated. Scraped down the sides of the bowl and stir in the vanilla.
  10. To assemble: Spread a layer of frosting onto each cupcake. Pour the candied ginger into a shallow baking dish and dip each frosted cupcake, shaking off any access. Serve.

Yields: 36 cupcakes

Verdict: Deliciously flavoured spice cake

Prep Time: 30 minutes
Baking Time: 20-25 minutes

Rating: 7/10

Hawaiian Carrot Cake with Coconut Icing (Recipe)

Thanksgiving is one of my favourite times of the year. I love getting together with family and friends and enjoying a traditional meal of turkey, stuffing, cranberries, roasted potatoes, maple-glazed carrots, and of course, an Autumn dessert. This year I wanted to go beyond the usual pumpkin pie and end the feast with an unconventional sweet finale.

I decided to make a carrot cake, but one with a tropical twist. It consists of four thin layers of pineapple-infused carrot cake sandwiched between an ample serving of coconut cream cheese icing. Unlike other carrot cakes, however, this one does not have any nuts, and instead is packed full of fresh-grated carrots, brown sugar, cinnamon and nutmeg, among other things. The cake is very moist and has a soft, dense texture. It makes a great finish to a classic Thanksgiving dinner.

Ingredients:

Hawaiian Carrot Cake
  • 1 cup chopped canned pineapple
  • 4 cups grated carrot (if you do not have a food processor, you can simply shred the carrots)
  • 2 1/2 cups all-purpose flour
  • 1 tbsp baking powder
  • 2 tsp baking soda
  • 1 tsp salt
  • 2 tsp cinnamon
  • 1 tsp nutmeg
  • 1 cup butter, room temperature
  • 1 1/4 cups golden brown sugar
  • 4 eggs
  • 2 tsp vanilla
  • 1/2 cup milk
Coconut Icing
  • 2 pkgs (250 g each) cream cheese, room temperature
  • 1 cup butter, room temperature
  • 1/4 cup sour cream or natural yogurt
  • 1 tsp vanilla
  • 2 1/2 cups sifted icing sugar (make sure you sift the sugar or else your icing will be full of bumps)
  • 1 cup sweetened flaked coconut

Directions:
  1. Preheat oven to 350° F. Spray or oil two 9-inch round cake pans.
  2. Finely chop drained pineapple, place in a sieve and press with a spoon to remove as much juice as possible. 
  3. Grate carrots using a food processor. Measure out 4 cups and set aside. 
  4. Place flour in a large bowl. Sprinkle with baking powder, baking soda, salt, cinnamon and nutmeg. Stir until blended.
  5. Place butter in a large mixing bowl and beat with an electric mixer until creamy. 
  6. Gradually beat in sugar, then beat on medium for about 3 minutes. 
  7. Beat in eggs, then vanilla. Beating on low speed, add about a third of flour mixture and beat just until mixed, followed by half the milk. Repeat additions, ending with flour. (The batter will be very thick).
  8. Gradually mix in pineapple and carrots.
  9. Divide batter between pans and spread to pan sides. To remove air pockets, bang pans on counter 5 to 6 times. Bake until centres seem set when lightly tapped, from 40 to 45 minutes. 
  10. Place on a baking rack to cool. After about 15 minutes, turn cakes out of pans and cool completely on racks. It’s best to bake cakes a day ahead of icing and leave at room temperature overnight.
  11. Place butter in a bowl and beat with an electric mixer until creamy. Beat in sour cream and vanilla. 
  12. Cut cream cheese into chunks. Reduce speed to low and beat in cream cheese, piece by piece. Add about a third of the icing sugar and beat on low until just mixed in. Scrape sides of bowl and beaters occasionally. Gradually add remaining sugar, beating just until smooth. Make sure not to beat too much, as this will cause thinning. If too thick or thin, work in a little sour cream or sugar. 
  13. Remove about a quarter of the icing to be used on top cake layer and set aside. Stir coconut into the remaining icing.
  14. Slice cakes horizontally in half. Place top of one cake, dome-side down, on a platter. Spread with a third of the coconut icing leaving a narrow border of cake around edge. Lay the bottom of that cake, cut-side down, on top. Spread with half the remaining coconut icing, leaving a narrow cake border. Top with the bottom half of the second cake, cut-side down. Spread with the remaining coconut icing, leaving a cake border. Top with the final layer, cut-side down. Spread with plain icing right to the edges. 
  15. Garnish with toasted, fresh coconut. You can toast flaked coconut on a baking sheet at 350° F for about 12 minutes, or until golden brown.
  16. Best to refrigerate several hours or overnight before serving.
Yields: 14 slices

Verdict: Unconventional twist on traditional carrot cake; extremely moist and flavourful; great way to end Thanksgiving dinner

Prep Time: 1 hour 20 minutes
Bake Time: 40-45 minutes

Rating: 8.5/10

Red Velvet Cheesecake Brownies (Recipe)

In honour of my sister's birthday, I decided to make her a special treat. I combined all of her favourite things...red velvet, cheesecake and brownies...into one delicious dessert! What can be better than this? Not much! In the end, they were a big hit and my sister was thrilled with her personally-tailored surprise. The brownies were rich and decadent and sinfully delicious. They also paired quite nice with a scoop of vanilla bean ice cream!

To experience the taste of heaven in your mouth, simply follow these easy directions:


Ingredients:
  • 1/2 cup unsalted butter
  • 2 oz chocolate, coarsely chopped (dark or semi-sweet)
  • 1 cup sugar
  • 2 large eggs
  • 1 tsp vanilla
  • 1 1/2 tsp red food colouring
  • 2/3 cup all purpose flour
  • 1/4 tsp salt
  • 8 oz cream cheese, room temperature
  • 1/3 cup sugar
  • 1 large egg
  • 1/2 tsp of vanilla

Directions:
  1. Preheat oven to 350 F. Butter the bottom and sides of a 8 inch metal baking pan. Put a long piece of parchment paper in the bottom of the pan, letting the parchment extend up two sides of the pan and overhang slightly on both ends. (This will make it a lot easy to remove the bars from the pan after they have baked.) Butter the parchment.
  2. In a small, heatproof bowl, melt butter and chocolate together. Stir until combined and very smooth. Set aside to cool for a few minutes.
  3. In a large bowl, whisk together sugar, eggs, vanilla extract and red food colouring. Add chocolate mixture and stir until smooth. Add flour and salt and stir until just combined and no streaks of dry ingredients remain.
  4. Pour into prepared pan and spread into an even layer.
  5. To prepare cheesecake mixture, beat cream cheese, sugar, egg and vanilla extract in a medium bowl until smooth. Distribute the cheesecake mixture in 8 dollops over the batter in the pan. Swirl in with a knife or spatula.
  6. Bake for 35-40 minutes, until brownies and cheesecake are set. A knife inserted into the cheesecake mixture should come out clean and the edges will be lightly browned.
  7. Let cool completely in pan on a cooling rack before lifting out the parchment paper to remove the brownies.
Yields: 9 large brownies

Verdict: Melt-in-your-mouth delicious (they would also make a great treat for Valentine's Day)

Prep Time: 25 minutes
Bake Time: 35-40 minutes

Rating: 9/10

The Village Café - Casual Elegant Dining in Westboro (Review)

September is a great month for many reasons. Fall means the arrival of colourful leaves, pumpkin spice lattés, boots and scarves, hearty meals and of course, my Birthday. I love spending this time of year with friends and family, trying new restaurants and catching up on our Summer adventures.

Westboro is a great place to find unique restaurants and cafés. We decided to try the Village Café, which has a fine reputation for serving fresh and delicious culinary cuisine since its opening in 1996. It's a small restaurant with only about 20 tables, but the high quality food, friendly service and decent price points make the Village Café a fabulous dining spot that I would recommend for anyone looking for a new and different palate experience.

We started off with the Mediterranean Plate, which we shared as an appetizer among six people. It included grilled vegetables, marinated eggplant, olives, tzatziki, hummus, grilled pita wedges, spanikopita and rice stuffed grape leaves. It was a great mix of nibbles, which we enjoyed while we waited for our main dishes. We were also lucky enough to get an extra order of pita wedges at no extra charge.

The Mediterranean Plate 
The main dishes vary depending on the season and available ingredients as the chefs like to cook with the freshest ingredients as much as possible. My two favourite main dishes were the Linguini Toscana and the Seafood Pasta. I'm obviously biased towards pasta dishes, but the roasted duck breast with risotto and vegetables was also a hit at our table.

Linguini Toscana
Seafood Pasta 
The linguini is a great dish for pasta lovers looking for something a little lighter than the usual creamy or heavy sauces. The pasta was topped with proscuitto, sun-dried tomatoes, cremini mushrooms, baby spinach and drizzled in a garlic infused olive oil. It paired well with the Woodbridge Sauvignon Blanc from California.

The Seafood Fettuccine pasta came with P.E.I mussels, shrimp, smoked salmon, fresh herbs, diced tomatoes, and a delicious creamy rosé sauce. It paired well with their red wine sangria.

They also feature different fresh mussels and fish every day and fine cuts of meat from high quality sources.

The Village Café is a great location for all who wish to enjoy tasty delicacies, great personalized service, and a comfortable, yet elegant atmosphere.

Verdict: Great selection of appetizers, pastas, and main dishes, friendly service, and reasonable prices. Highly recommended.

Cost: Mediterranean Sharing plate $22; Linguini Toscana $20; Seafood Pasta $23.

The Village Cafe, 295 Richmond Road, Ottawa. Open Monday to Saturday, 11am-3pm and 5pm-close; Sundays for Brunch and Lunch 10am-2pm.